Oculus Quest 1
Quick Summary
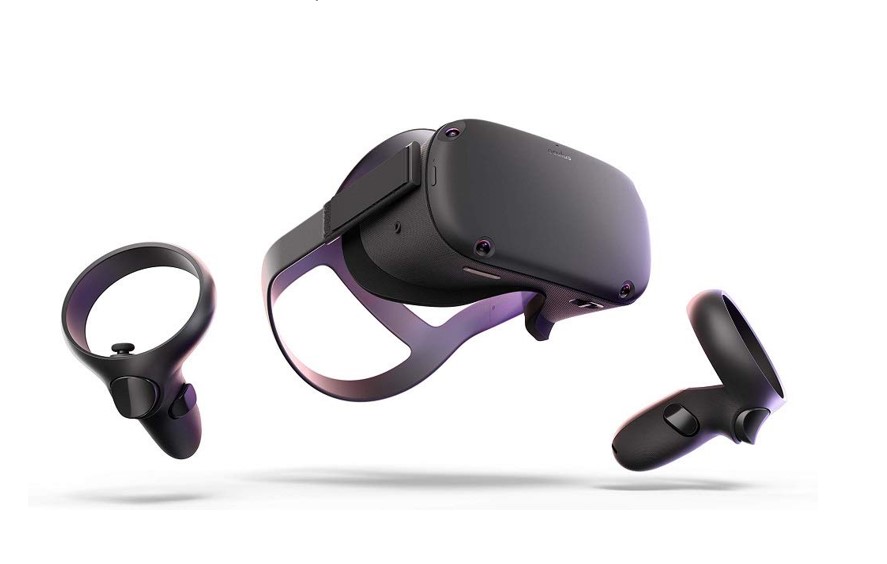
The Oculus Quest 1 is a virtual reality (VR) headset developed by Oculus, It is a standalone device that can run games and software wirelessly under an Android-based operating system.
The Kit
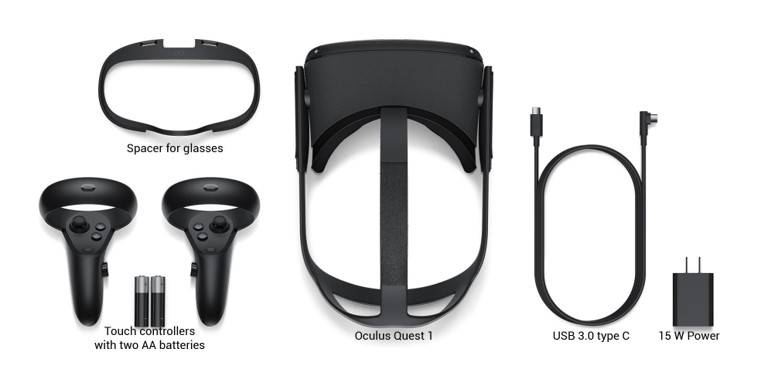
The Oculus Quest 1 kit will include the following items, please check that all items are present in the kit upon borrowing and returning.
- 1x Oculus Quest 1
- 2x Touch controllers
- 1x USB 3.0 type C cable
- 1x Spacer for glasses
- Be careful of the real world. While in VR you can only see the virtual world and can’t see real-world obstacles. Take some time to clear out any chairs and desks from the blue play area.
- Keep Lenses Away from Direct Sunlight. Sunlight can cause permanent damage to the lenses, therefore please keep the headset away from windows and don’t use it outside.
Before you start
Please install the “Oculus app” on your mobile device.
This is necessary to install the device.
Take your phone and download the Oculus here:
Download the on the App Store: Meta Quest
Get it on Google Play: Oculus
Setup
Wearing the Headset
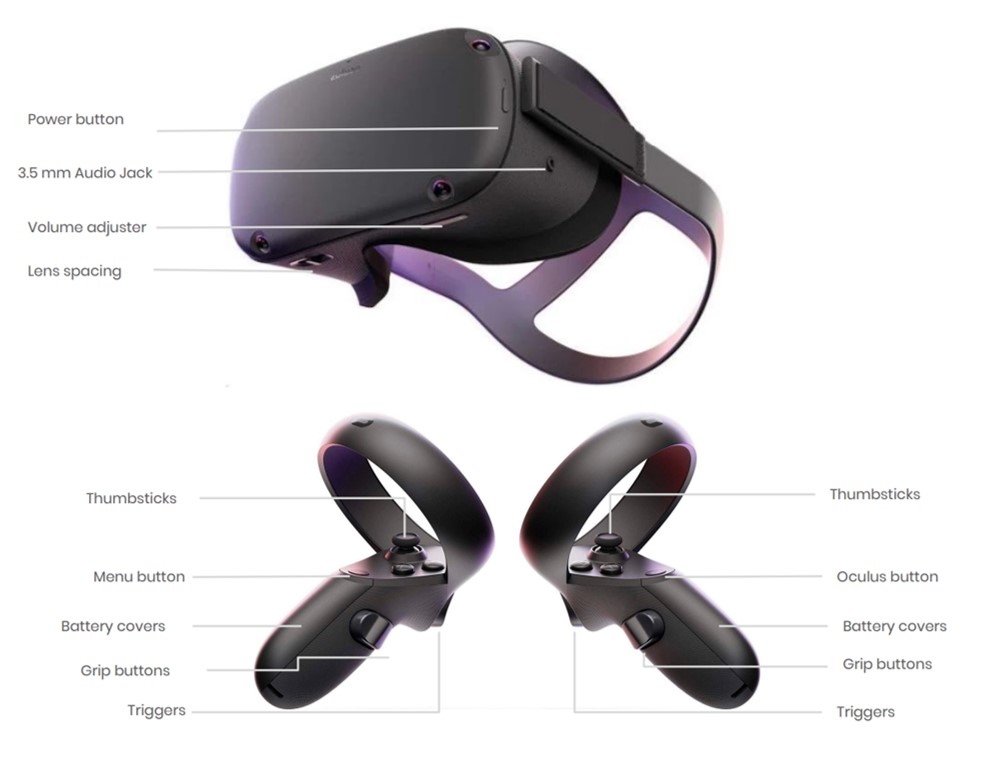
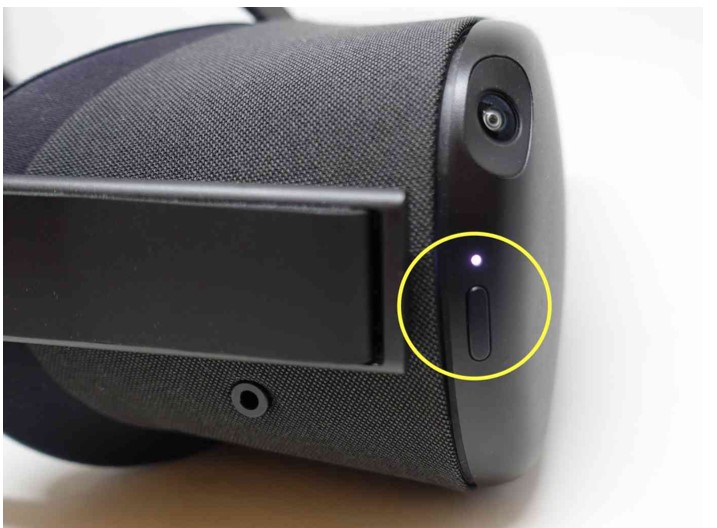
1. Press the power button on the right side of the Oculus Quest Headset. After pressing it, the button should emit a white light.
- If the button emits a red light, it needs to be charged using the charging cable.
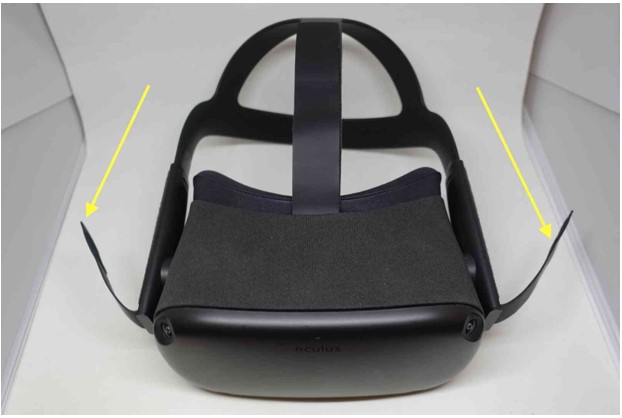
2. Before putting on the headset, adjust the Velcro straps on the sides of the headset. Pull the straps to make the headset tighter and push it back to make it looser. The straps are shown with arrows.
- Make sure that the straps aren't too tight. The headset should fit comfortably and not apply too much pressure on your face and head.
3. To put on the headset, push the straps up and place the headset on your eyes. Use your left hand to put the straps down on your head.
- If you’re wearing glasses, put on the headset from the front first.
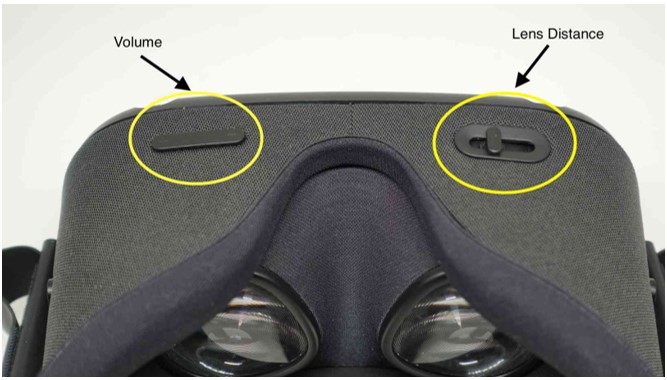
4. To change the volume and adjust vision, please see the picture below for the volume and lens distance button.
Setting up the VR space
For the Video Tutorial click the link below.
Oculus Quest Basics Tutorial: Play Area Setup
- When the Oculus turns on and after a few seconds of loading, you should see a black-and-white version of your surroundings. Grab the two remote controls now.
- A window will pop up shortly, directing you to create a series of boundaries using the remote controllers. After creating your boundaries, a blue fence will appear around you representing the limits of your playable area.
- You will then be led to the main menu of the Oculus Quest where you can navigate to many applications. You can select anything on the menu by clicking on the trigger button on the back of either remote control using your forefinger.
Controllers
You can use your controller to interact with apps and games, using the buttons on your controller to do the following:
- Trigger, A and X buttons: Press to select things.
- B and Y: Press to go back to the previous screen or menu.
- Oculus button: Press to go back to Oculus Home or press and hold to reset your controller orientation.
- Grip button: Press to grab objects or make a fist when using your virtual hands.
- Menu button: Press the menu button from Oculus Home to bring up the menu.
- Press any button to wake the controller after you turn on your headset
Connect to the WIFI
The Oculus Quest needs to be connected to a Wi-Fi network to use and access most features and content.
- Click on ‘Settings’ in the taskbar.
- Click on ‘Wi-Fi’.
- Choose the Wi-Fi you want to connect with and select it.
- Enter the password of the selected Wi-Fi and click connect
Other Resources
Please find the video tutorial at the link below.
Oculus Quest Basics Tutorial