Leica P16 3D Scanstation
Quick Summary
The Leica ScanStation P16 features an intuitive and user-friendly touchscreen interface. The one-touch scan button and wizard-style software guarantee an easy workflow and enable a fast data check in the field. Combined with WLAN remote control, the Leica ScanStation P16 can be operated by any handheld device.
Scanning Parameters
| Distance | 0.4m-40m |
| Accuracy | 3mm at 40m |
| Scanning field of view | Horizontal 360°, Vertical 290° |
| Points per second | 1,000,000 |
| Colour | Yes |
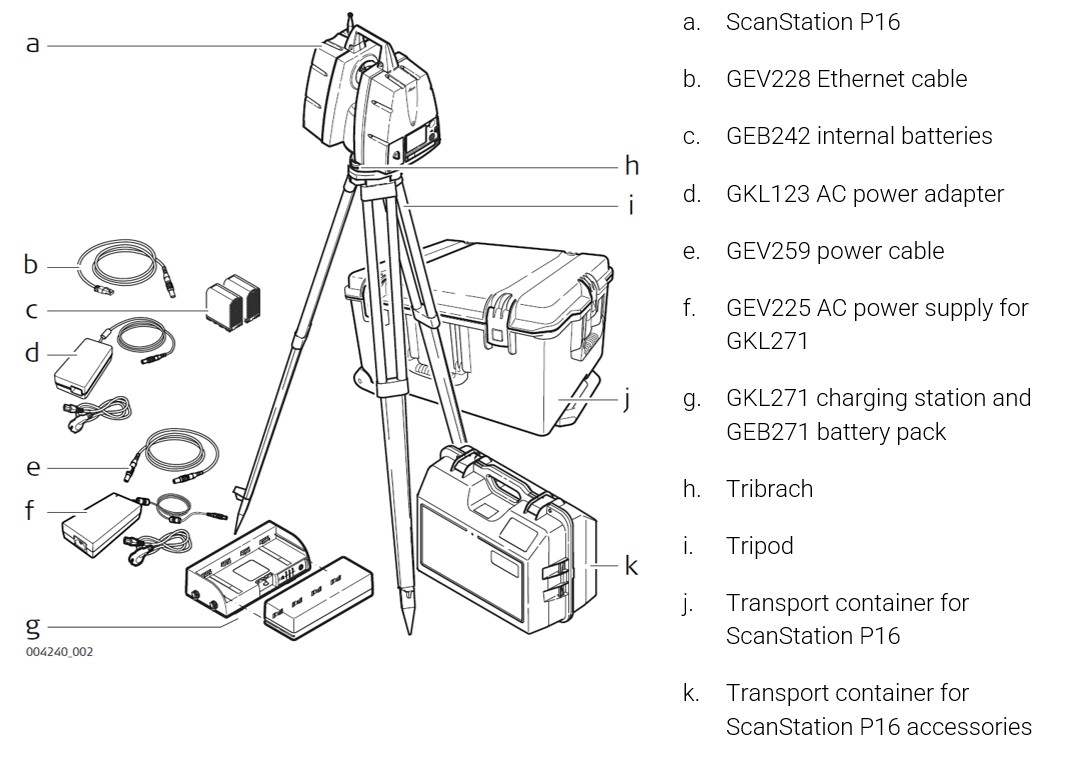
The Kit
To create a scan with the Leica P16 you will need the following items:
Please find the full Leica P16 documentation available for download here, you will find a summary below.
Scanner Setup
ScanStation P16 setup on tripod step-by-step:
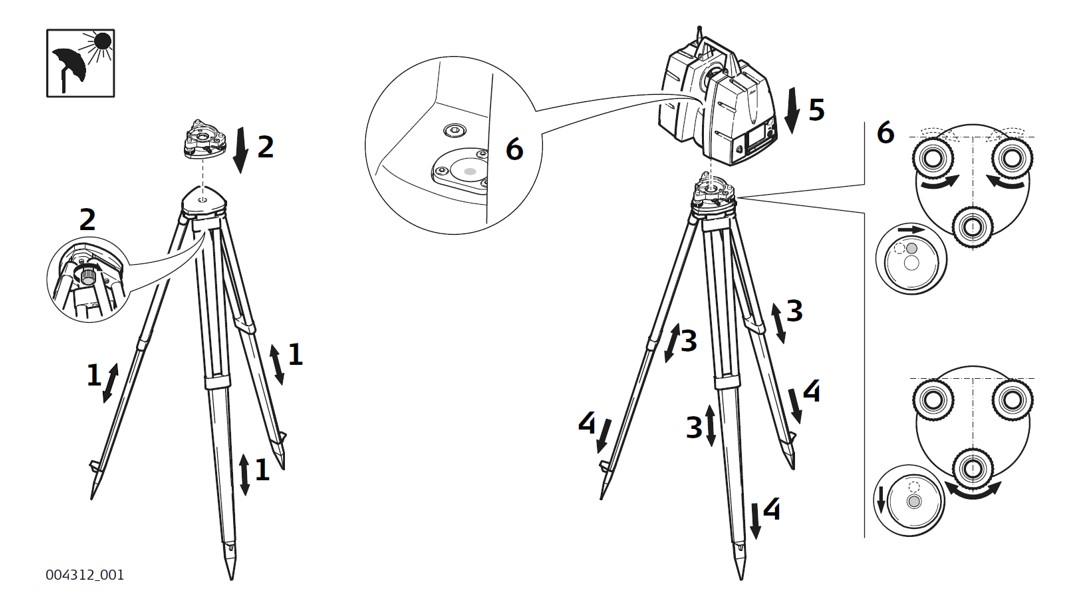
- Extend the tripod legs to allow for a comfortable working posture. Tighten the screws at the bottom of the legs.
- Place the tribrach on the tripod and secure it with the central fixing screw.
- Set up the tripod so that the tripod plate is as horizontal as possible.
- Push the tripod legs firmly into the ground.
- Level up the instrument using the instrument’s circular level. Turn two of the foot screws together in opposite directions. The index finger of your right hand indicates the direction in which the bubble should move. Now use the third foot screw to centre the bubble.
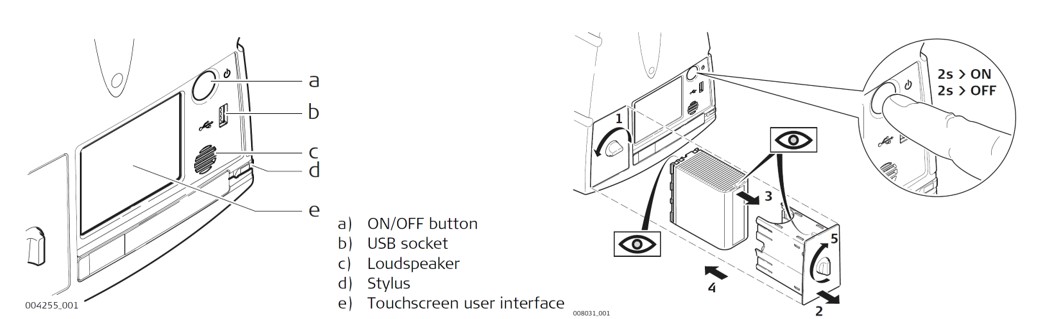
The User Interface
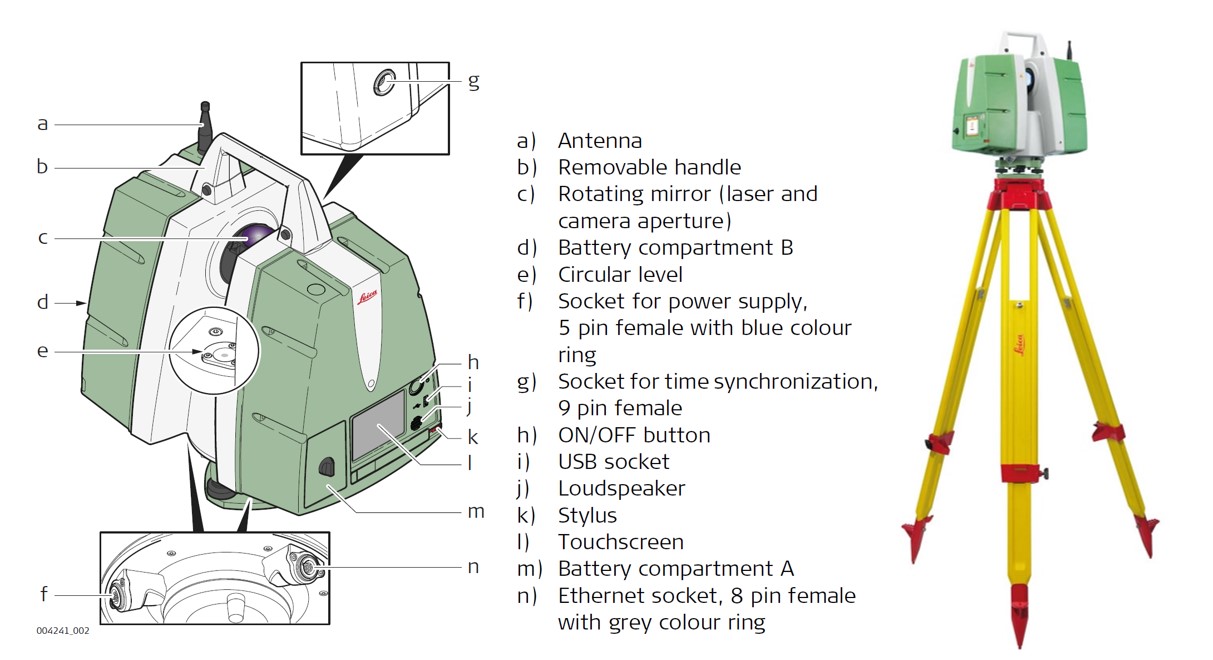
ON/OFF button and USB socket is located on the front of the face plate.
Press and hold the ON/OFF button for 2 seconds until a beep is audible.
The Main Menu screen will be displayed after the system boot process. Ready in the message bar indicates that the instrument is ready for scanning.
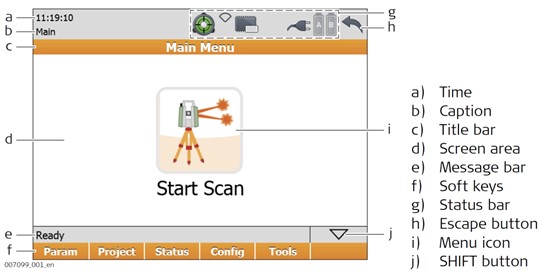
Scanning
Scan
Select Main Menu, Pressing the Start Scan button immediately starts a scan and/or imaging process with settings as defined in Param.
Scan data is stored on the ScanStation P16 by projects which contain stations for each scanner position. In the Projects menu, a new project can be created or an existing project can be selected. The results of the scan process as started by Start Scan are stored in the selected project.
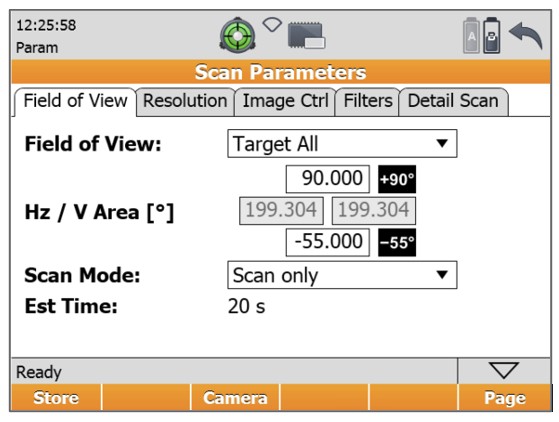
Scan Parameters
Select Main Menu, Param, Scan Parameters.
The Scan Parameters menu offers five pages for all kinds of scan and image controls: Field of View, Resolution, Image Ctrl, Filters and Detail Scan.
Project management
Select Main Menu, Project. In the Projects menu, all commands for project management are available at the bottom.

Data Transfer
Select Main Menu, Tools, Transfer. In the Transfer, menu projects can be transferred from the scanner’s hard disc to an external USB memory storage device and vice versa.
![]()