HTC Vive (Steam)
Quick Summary
The HTC Vive implements "room-scale" virtual reality, whereby a user can walk freely around a play area rather than be constrained to a stationary position. The controllers and headset use a positional tracking system known as "Lighthouse"; multiple external base station units (also referred to as "lighthouses") are installed in the play area, which each contain an array of LED lights and two infrared lasers.
- You will need a VR-capable computer with an HDMI output if the kit does not include one.
The Kit
The HTC Vive kit will include the following items, please check that all items are present in the kit upon borrowing and returning.
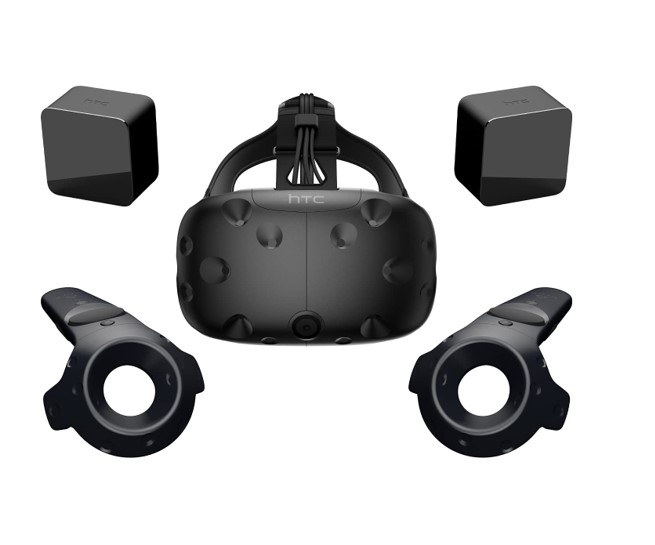
- 1 x HTC Vive VR Headset, w/ fixed HDMI, USB, Audio
- 2 x HTC Vive Controllers
- 2 x Base Station sensor
- 1 x Micro USB
- 1 x Linkbox
- 3 x Power Adapter
- 1 x Sync Cable
Please find the HTC Vive User Guide Here:
HTC Vive (Steam) User Manual
Setup
Space Considerations
The scanner is available via bookings and you must have completed the induction training before using it.
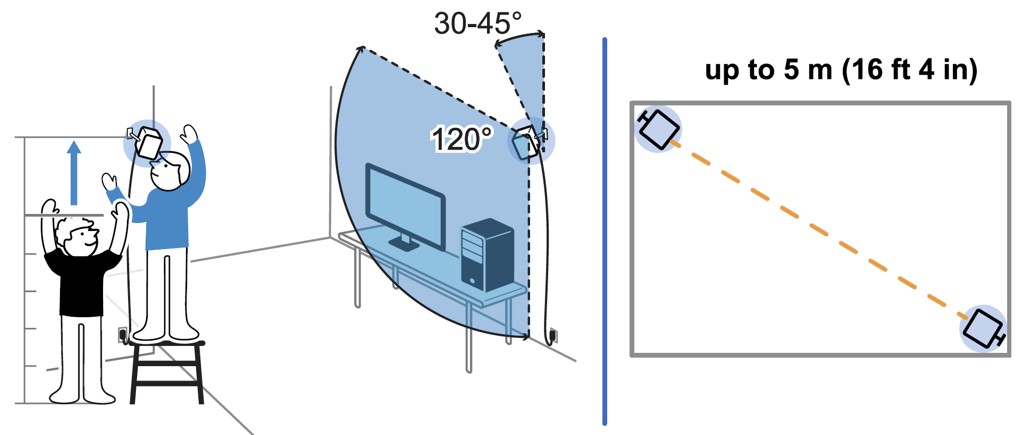
Ensure that there is adequate space for VR.
- For Standing-Only experiences, enough standing and arm room are enough.
- For Room-Scale experiences, a minimum area of 2m x 1.5m is required.
Ensure the space is clear of all potential tripping hazards.
Base Station Sensor Setup
VR works best when base stations are opposite, and can see each other all the time, and the headset and controllers have at least one base station in view of them.
The viewing angle is 120 degrees in all directions, ensure adequate coverage by tilting the sensors 30-45 degrees towards the ground.
Hardware Setup
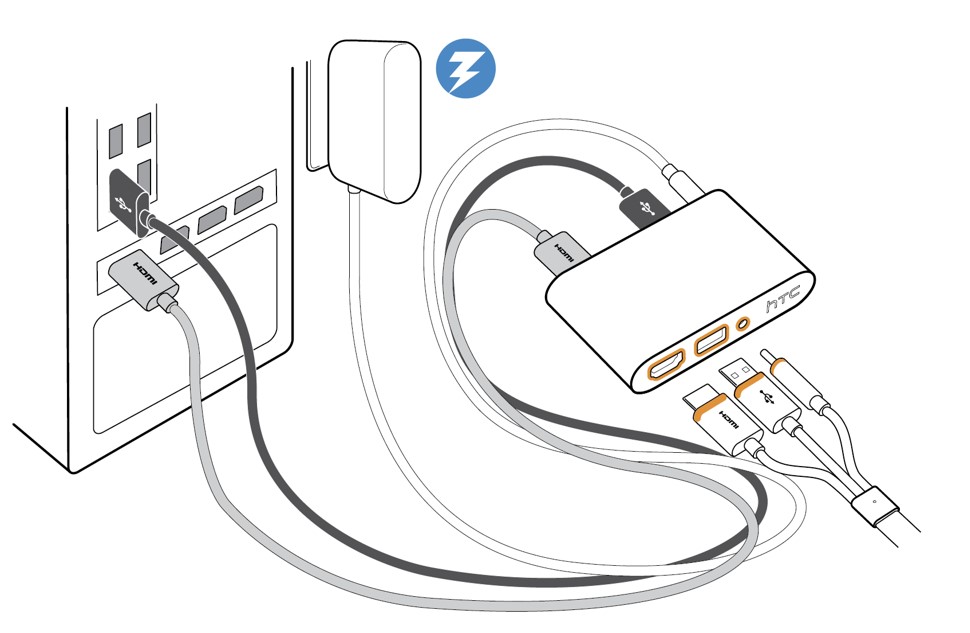
The headset needs to be connected to the link box, note the orange trim to denote the appropriate connection side.
The link box then requires USB and display (HDMI or DP) to your machine and power.
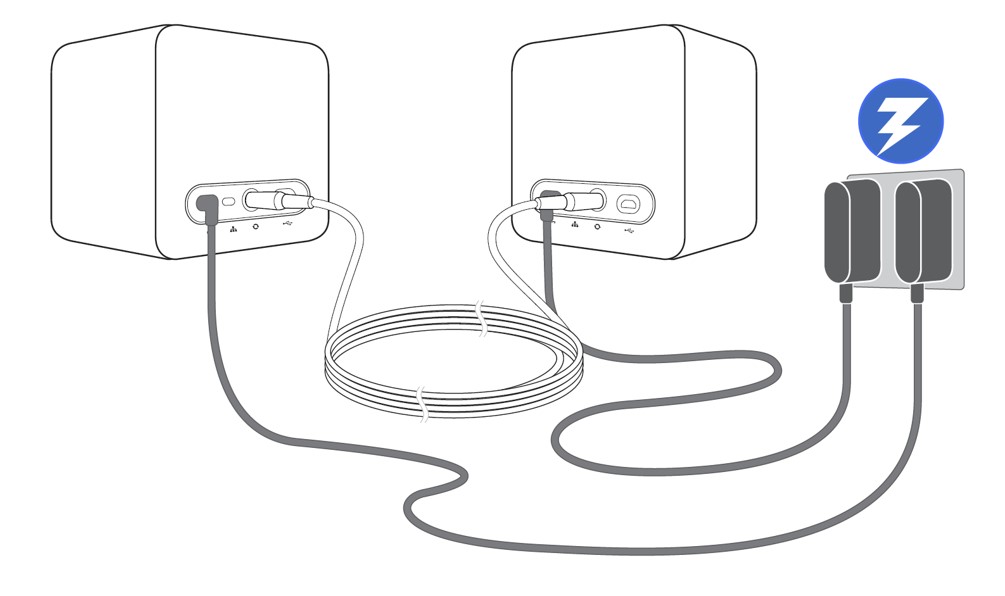
Base stations to power
Connect each base station to power.
The Sync cable may be used between each base station sensor as a potential fix for sensor-related issues, but we recommend that they be disconnected to start.
- If you are using only 1 (be wary of limited tracking): set the sensor to mode B using the mode button at the back.
- (Standard) If you are using 2 sensors without the Sync cable, set one to B and one to C.
- If you are using 2 sensors with the Sync cable, set one to B and one to A.
Software Setup
- Download and Install VivePort is available here:
Setup Your VIVE - Download and Install Steam is available here:
STEAM - Download and Install SteamVR, please refer to the latter section of Steam (for VR) for more details.
- Link the Controllers: Once the Controllers are turned on, they should automatically pair with the headset. To manually pair the controllers, launch the SteamVR app. Go to SteamVR ▼ > Devices > Pair Controller and follow the on-screen instructions.
- The SteamVR Status Window, will open and green lights will indicate the technology is connected and ready to go. Base sensors must be able to see (1) each other, and (2) the headset and controllers, to connect successfully.
In the image below, the headset and both controllers are connected, whilst the base stations are not.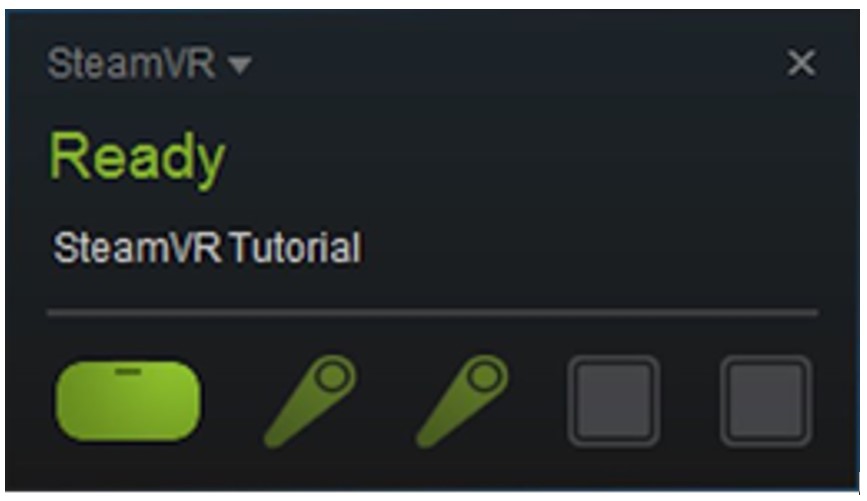
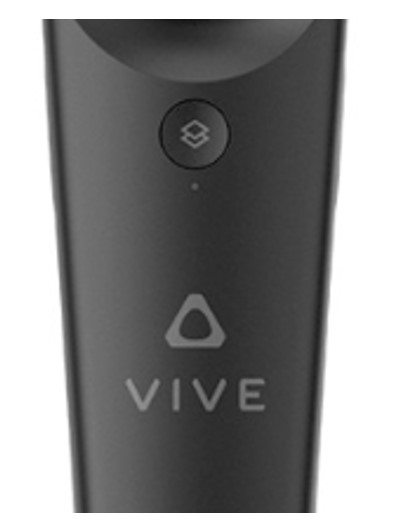
- Turn on the controllers with the button just above the Vive logo This is the menu button:
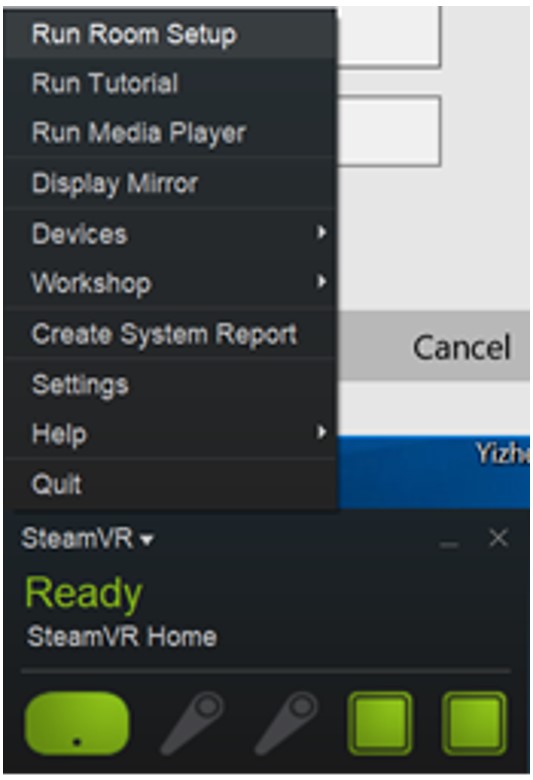
- Launch SteamVR run room set-up:
SteamVR ▼ > Run Room Setup - Follow the directions provided by the program to calibrate space and controllers.
Steam VR should now be ready to go. - Steam VR should now be ready to go