Leica Cyclone REGISTER 360
Quick Summary
Leica Cyclone REGISTER 360 is designed to bring speed, scale and simplicity to your digital reality workflows thanks to a new visual project interface and guided workflows. New and experienced users alike will appreciate that the registration process has been streamlined while maintaining the uncompromising quality you have come to expect from Leica Geosystems’ software solutions.
Please find the official user manual available here, you will find a summary below.
Installation
Please download the setup files of the Cyclone REGISTER 360 or Cyclone REGISTER 360 (BLK Edition) via the links below.
Cyclone REGISTER 360 Setup File
Cyclone REGISTER 360 (BLK Edition) Setup File
- The Cyclone REGISTER 360 (BLK Edition) make the most of your BLK360 and BLK2GO data with automatic registration, precise visual alignment, easy cleanup, and multiple visualization and export options.
Steps of Installation
1. Right-click on the Cyclone REGISTER 360 (BLK Edition) Setup File and select "Run as administrator".
2. Follow the directions in the InstallShield Wizard.
3. When prompted, choose your Project Storage location.
4. Complete the installation by selecting “Finish”.

- The storage folder for Cyclone REGISTER 360 should NOT be the same folder as the JetStream Storage folder if JetStream is installed on the same computer.
Licensing Setup
- You must have an Internet connection to enable your license. If you do not, please review the “Leica Cyclone and CloudWorx Client License Management System” document that goes over setting up an Entitlement ID (i.e., license) offline.
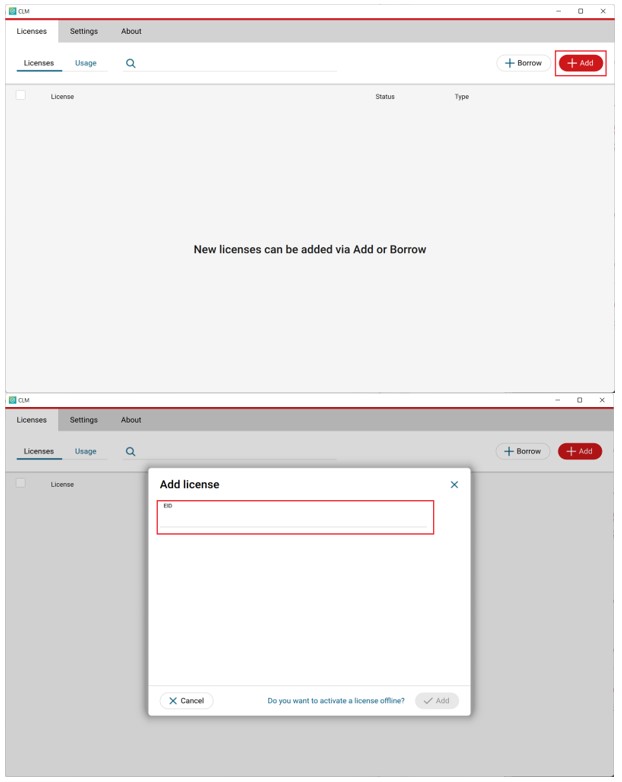
Once you have installed Cyclone, open the Client License Manager for Floating Licenses, located here: Start Menu\Programs\Leica Geosystems\CLM License Manager New.
Choose the "Add" option, then enter your Entitlement IDs (EID) in the open field.
User Interface
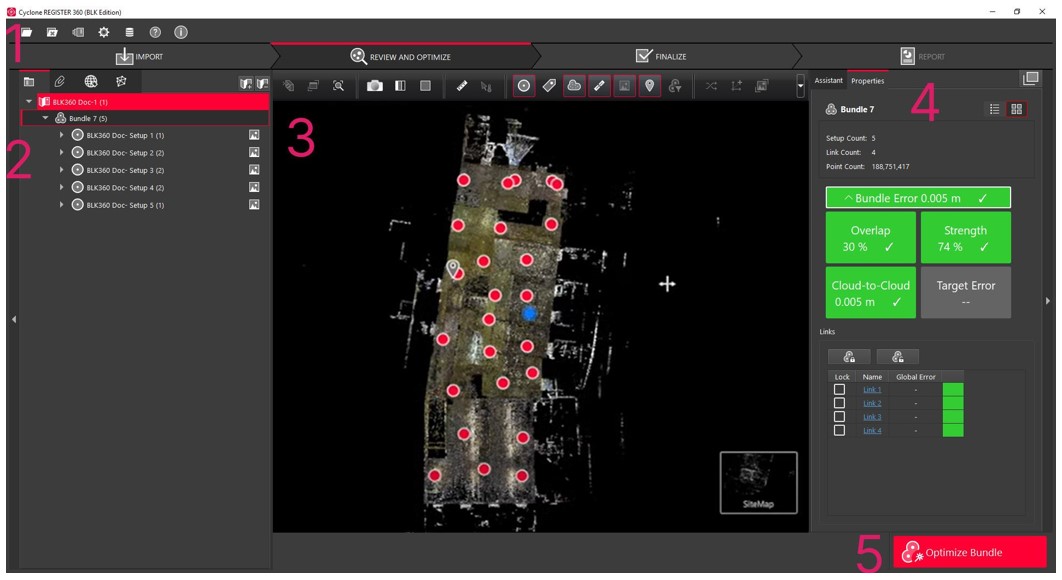
- The top menu has your standard File > Open/Save and Preferences/Settings. Right beneath it is the Workflow Menu.
- The left menu is generally used as an overview of your data, use this menu to view/select individual Setups, Bundles and Links.
- The 3D Viewport shows a preview of the point cloud that can be navigated. Any further processing will also be done here.
- The right menu is generally used for the Assistant and Properties panels.
- The Assistant panel has extra controls and options when going through the workflow, while the Properties panel relays information.
- This giant red button moves your project to the next stage of the workflow.
Scan Project Workflow

1. Import
Begin by clicking the top left option to open an existing project or clicking Create New Project, enter a project name and click OK.
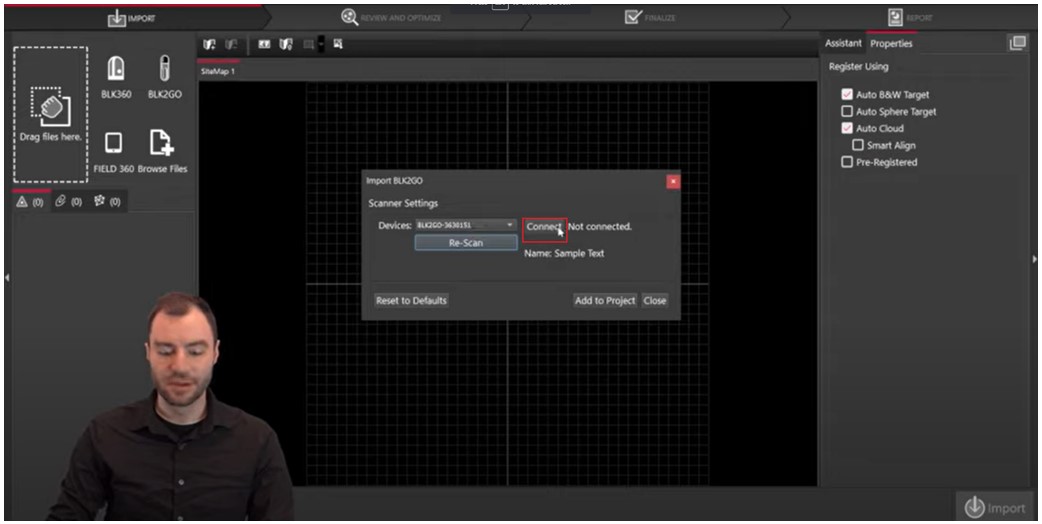
Connect BLK2GO for Wireless import
To import wirelessly, connect the computer to the BLK2GO via Wi-Fi settings. Enter a password that can be found on the card with the BLK2GO or on the inside of the battery.
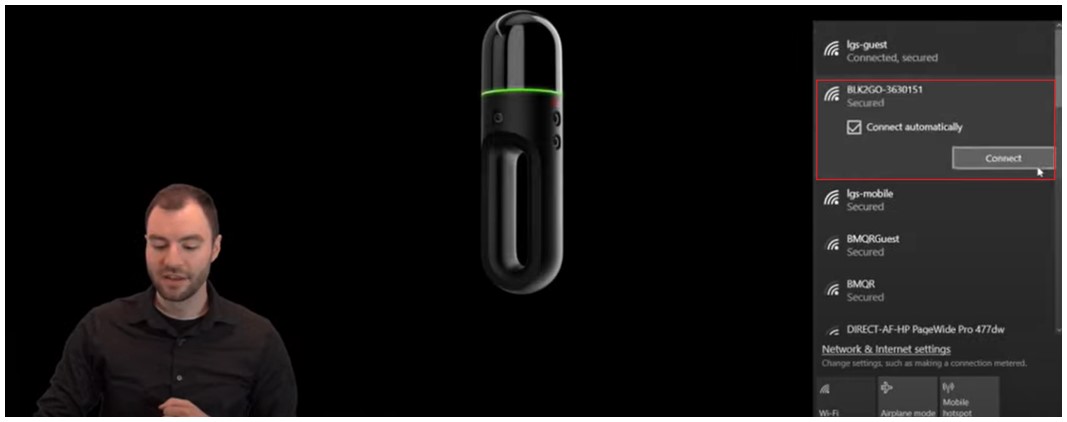
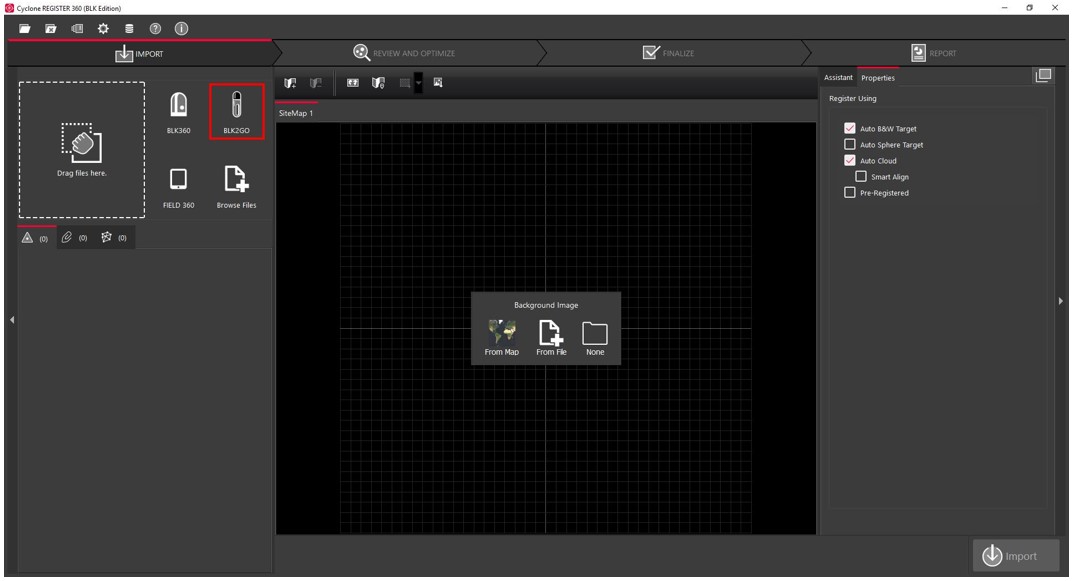
You will notice on the left that there are a few ways to bring data into Cyclone REGISTER 360. Click the BLK2GO Import button.
It's automatically going to find the BLK2GO, and then clicks Connect.
Import
Select the projects you wish to import in the left menu, and Import the data.
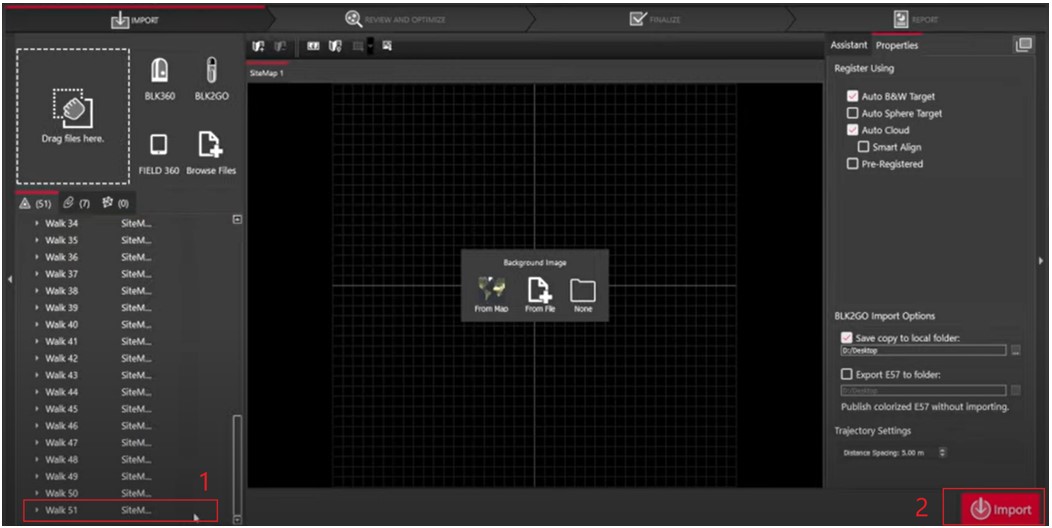
- In the right Assistant menu, there are import options including Save copy to a local folder, Export E57 to folder and trajectory settings if needed.
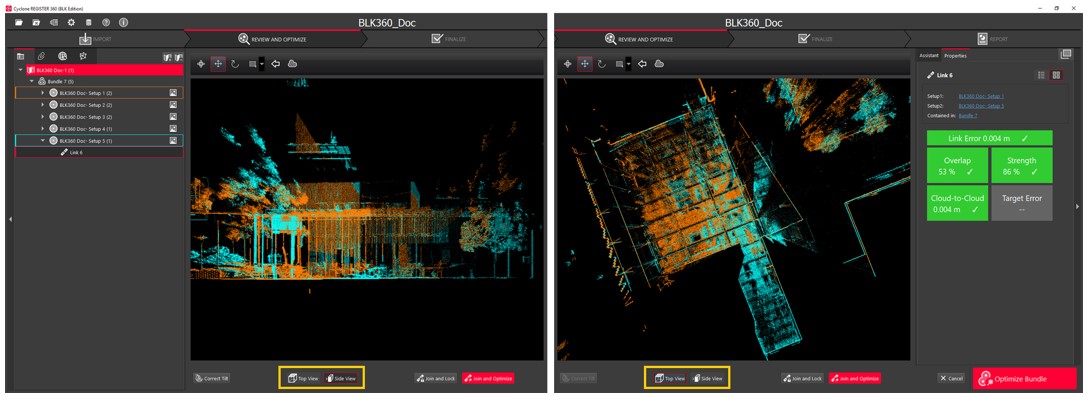
2. Review and Optimise
Registration
After importing the scans, select any two scans and use the functions at the bottom of the viewport to register them together and create links:
If you are confident in the scan data, you may roughly position them and use the auto cloud.
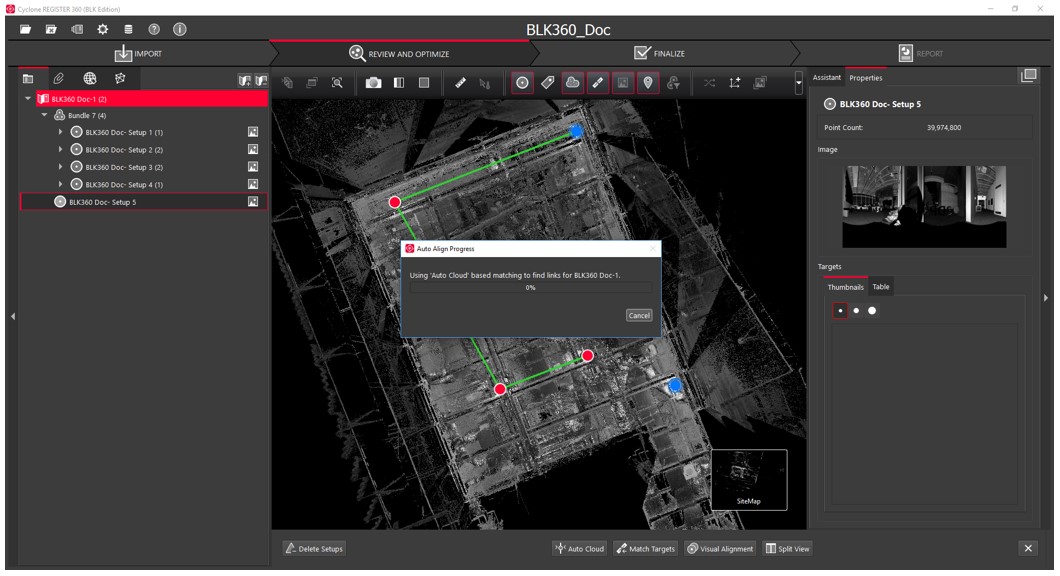
Otherwise, visual alignment can be selected for the scan and with the gumball tool, adjust the scan to align roughly with the other scan.
Clean Up Point Cloud
There is a plethora of tools located right above the 3D Viewport that allows you to clean up the dataset. Marquee selection allows you to define a region of points to remove.
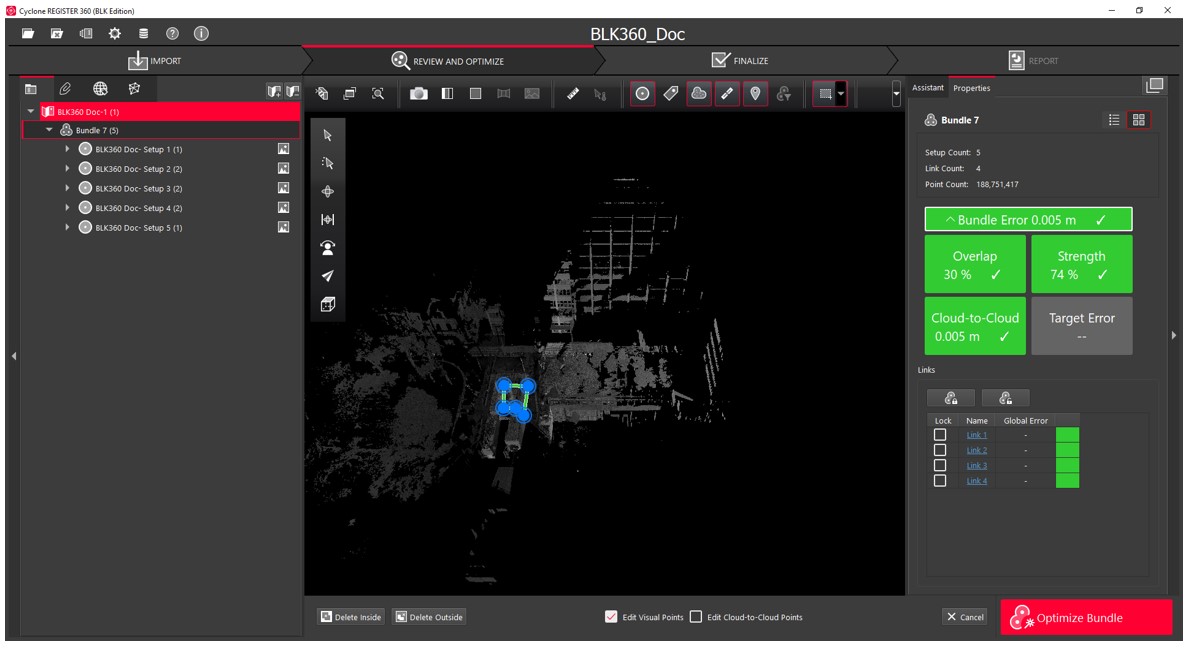

Optimise Bundle
When your data set is fully prepared, click Optimise Bundle to proceed to the next step.
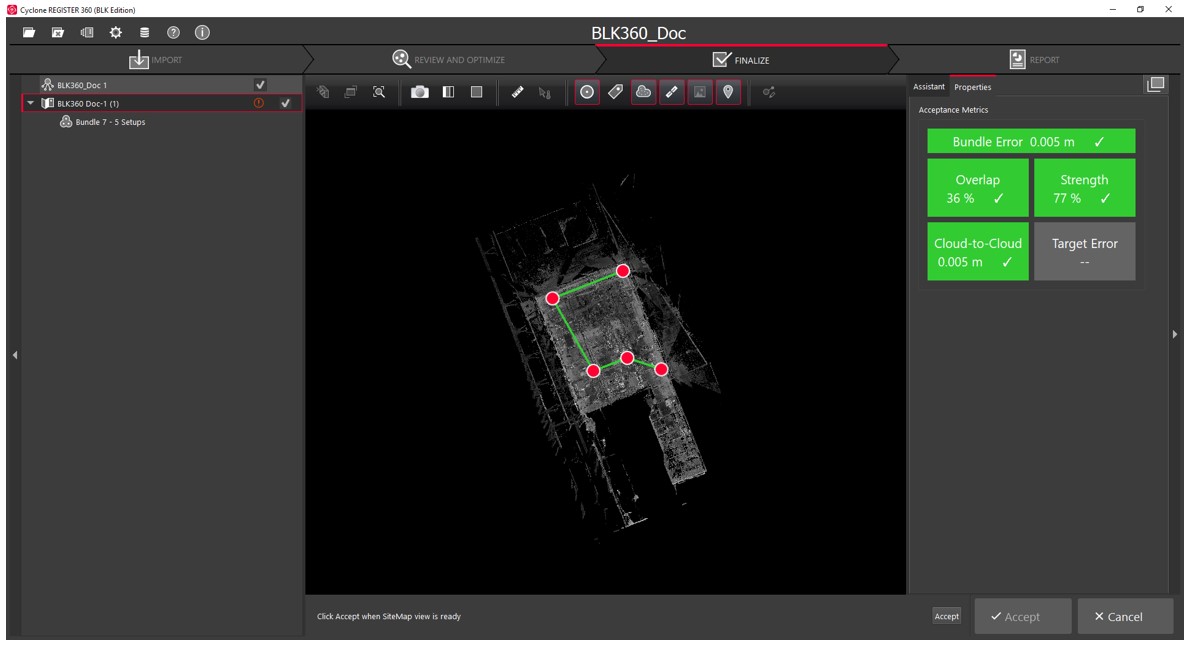
3. Finalise
This phase presents you with the final data set. Accept the dataset to proceed to the next step.
4. Report
When everything has been finalised, the Report phase is used for two primary purposes; Reporting and Exporting.
- Reporting is used to generate a PDF that collates the Registration results; accuracy, alignment, and strength of links amongst others. This is primarily used as proof for confirming that the dataset is accurate.
- Exporting is for extracting all the point cloud data into an accessible and transferable format to be used in other workflows.
Exporting
To export point cloud data, use the menu on the right.
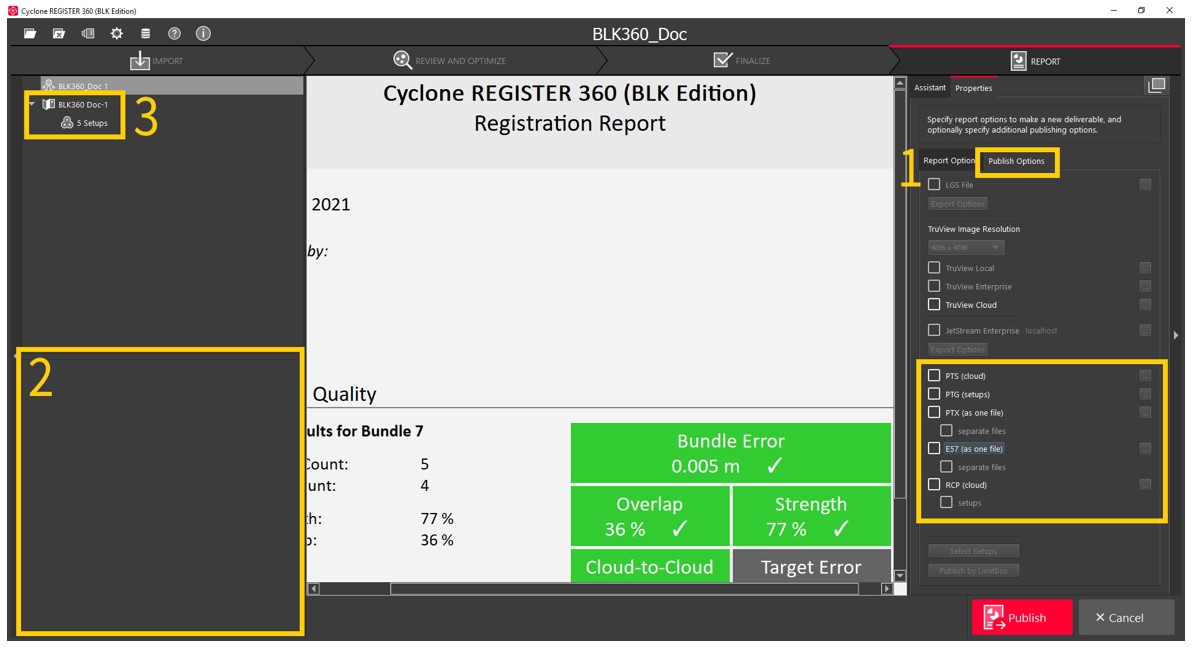
1. With the Publish menu selected, the bottom batch of options is the point cloud export options. The common file types are:
- PTS: Common raw point cloud file type with position (x, y, z) intensity, and colour (r, g, b) data for each point.
- E57: Common format for registered point clouds, can export as one single cloud or as separate aligned files, useful if you wish to do more processing in other software or workflows.
- RCP: Autodesk Recap file if you wish to use this data in Autodesk Recap.
2. A log of your exports will be kept here, this is key because the software is unable to export any set of data (point clouds and/or reports) under a name it has used previously, even if it is to a different folder.
3. If you need to export the same dataset after some adjustments, you can rename it here (Right-Click or Double-Click) so as to not conflict with the export log-in.
Finish
Ensure that you have saved a copy of your data from Cyclone Register. The best way to do this is to export your project as a .raf archive file.
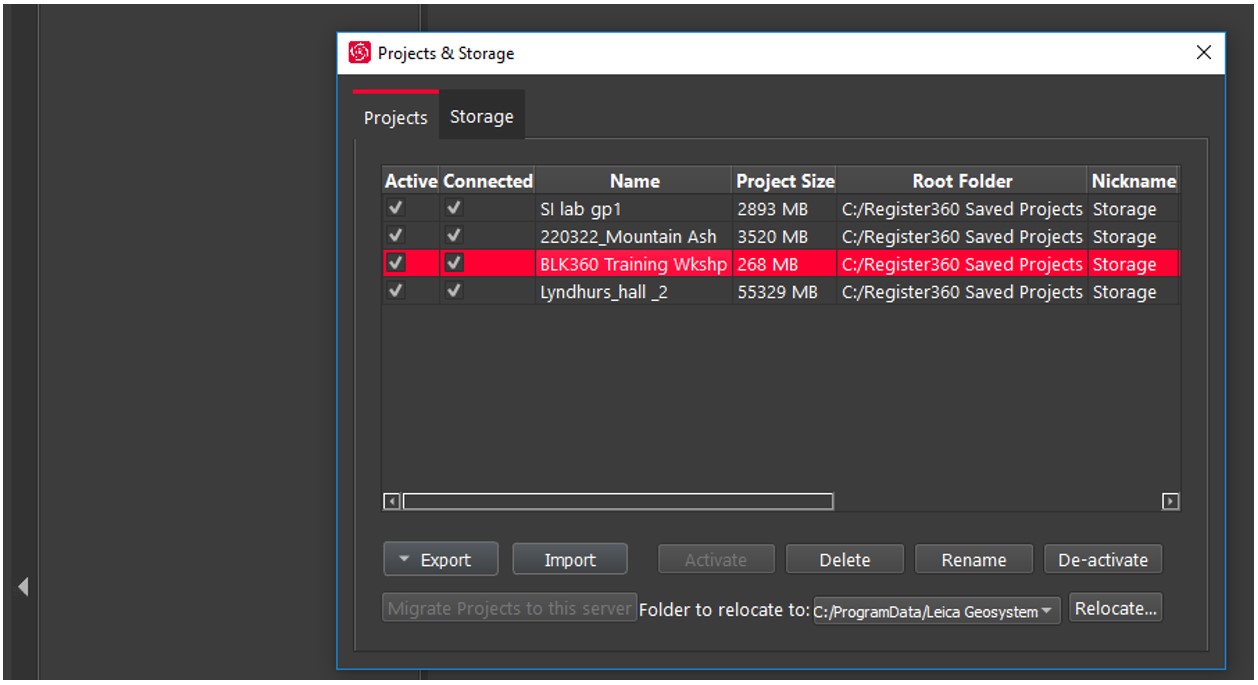
You can access the archive file from the 'Register 360 Saved Projects' folder.

Other Resources
Please find the official video tutorial at the link below.