Fologram
Overview
Fologram is designed as a plugin that streams data from Rhino and Grasshopper to a Hololens or mobile device.
Please find Fologram's documentation via the link below to start learning.
Fologram Knowledge base
The following will begin with the Fologram for Hololens device, and then read the workflow about Fologram for Rhino and Fologram for Grasshopper.
Fologram for Hololens
Setup
- Ensure your Rhino/GH machine and Hololens are on the same wi-fi network.
Launch the Application
Launch the Fologram application through the Start Menu.
Connect to Rhino/Grasshopper
Upon launching, you will be immediately prompted to scan a QR code to connect to a Rhino session. Look at the QR code generated in Rhino. Refer to the latter section of Fologram for Rhino for more details.
Model Placement/Snapping
Upon successful connection to Rhino, Fologram will be prompted to set the origin point of the holographic scene. This is tied to the origin point of the Rhino scene.
The Hololens intermittently scans and maps a very rough 3D representation of your immediate environment. This allows you to roughly snap to surfaces. For the most part, this is perfectly acceptable.
The Fologram Menu gives you further manipulation if required.
Navigation and Interaction
Fologram only uses air tapping for interaction.
Fologram Menu
Tap and hold to bring up the Fologram Menu.
This menu gives you access to the following functions:
| Menu Function | Description |
|---|---|
| Snap to QR Codes | For precise model placement, this is the way to go. Generate and print QR codes to use as snapping through Fologram in Rhino. |
| Parameters | Control any sliders, toggles or buttons synced through Grasshopper. |
| Layers | Linked to Rhino layers, use this to toggle locks and visibility. |
| Edit | Allows for the coarse transformation of the scene based on the origin point. Allowing for moving, rotating and scaling. |
| Models | Load or save a model. These models are stored on the Hololens itself so a Rhino connection is not needed. Note that Grasshopper elements are not saved in any way. |
| Settings | Host a variety of useful functions and display settings. Restart can be found here to restart the application. A variety of display settings can also be found here, such as toggling shadows, sizes of elements, etc. |
Fologram for Rhino
Overview
Fologram for Rhino allows you to view any geometry in your Rhino viewport in mixed reality using the HoloLens.
Please find the Official tutorials here:
Tutorials of Fologram for Rhino and Grasshopper
Installing Fologram
- Fologram for Rhino is designed to run using the latest service release of Rhino 5 or Rhino 6 and may not support all older releases of Rhino.
- You can download and install Fologram from the Fologram website below.
Connecting a Fologram
- You must ensure that all your devices (mobile, laptop, hololens) are on the same wifi network.
HoloLens must be connected to a Wifi network in order for Fologram to work. Connect to your Wifi network or UniWireless if you are on campus.
- Launch the Settings app on Home Screen
- Open Network and Internet page
- Select your desired network and log in. (ensure all connections are in the same network)
Opening Fologram in Rhino
- Ensure you have the most up-to-date plugins for Rhino3D and Grasshopper.
- Close Rhino if it is already open.
- Locate FologramForRhino.rhi file and launch the installer.
- Install the package and re-launch Rhino.
- Click on the Fologram button or type “fologram” in the command bar.
- Click on “Add Device” to display the QR code required for connection.
Streaming your Models
Check out Fologram's article on this topic here:
Fologram will detect and synchronize any change in your Rhino document with the mixed-reality model on the HoloLens. To stream your own models to the headset you can open a new model or import your models into an existing document running Fologram.
- Ensure the Rhino C-Plane is neutral (X-right, Y-forward, Z-up)
Scale and Position
- Most architectural models are on a real-world scale. Be sure that the 0,0,0 point of your model is at a point that makes your model easy to place in mixed reality e.g. at the corner of your building.
- Very large models can be difficult to place as you may be behind or inside parts of your model.
- Consider setting a scale factor using the Fologram scale tool (under the blue ‘Add Device’ button in the plugin window) before placing models at 1:1 in mixed reality.
Detail
1. The HoloLens runs a mobile chipset and is not optimized for very detailed models with high poly counts.
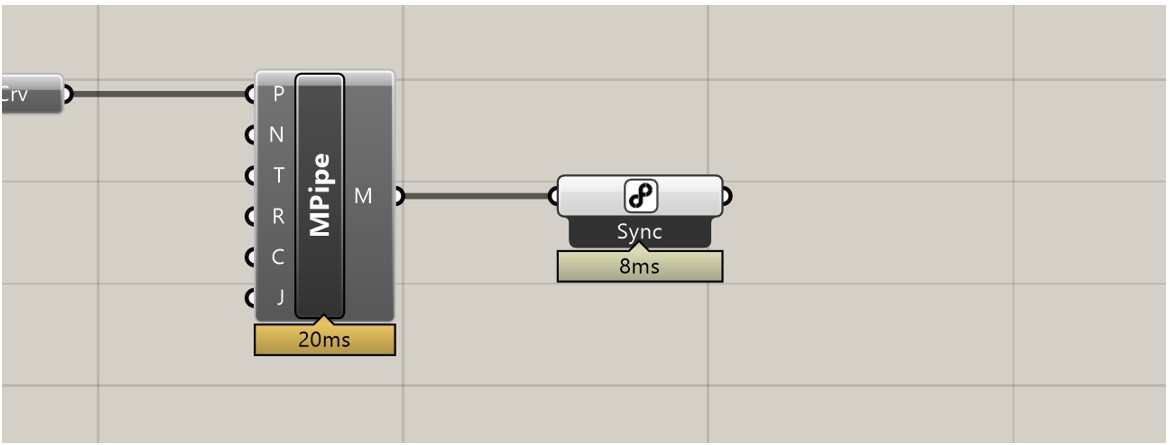
2. Fologram will synchronize your Rhino document using Rhino's default render mesh settings for all NURBs geometry. This can create very large meshes from surfaces with high curvature, especially piped curves.
3. Consider manually meshing NURBs geometry before streaming. Aim for <1m polygons.
Setting up a model for mixed reality
If you are experiencing issues with frame rates, synchronization times or disappearing geometry on the HoloLens you may want to consider setting up your Rhino scene for optimal performance in mixed reality. This includes customized meshing of NURBs geometry, decimating mesh geometry, and checking geometry normals and materials.
Fologram’s article covers preparing your Rhino models for mixed reality very well. You can check it out here:
Preparing your Rhino models for mixed reality
Solutions for display curves
By default, Fologram does not display curves from Rhino into the Hololens. There are some workaround solutions for this which are discussed in the video below.
Fologram for Grasshopper
You can use the full power of grasshopper with Fologram, this enables you to control scripts through Fologram, set up interactive scenes for fabrication workflows or for quick design prototyping.
Please find the Official tutorials here.
Tutorials of Fologram for Rhino and Grasshopper
Installing Fologram for Grasshopper
Fologram for Grasshopper comes packaged with Fologram for Rhino and will be installed during setup.
To launch Fologram for Grasshopper, type the Grasshopper command in Rhino to launch Grasshopper. The Fologram for Grasshopper components will appear in a toolbar called Fologram.
- Fologram for Rhino needs to be running and connected to a device to work with Fologram for Grasshopper
Fologram for Grasshopper
Fologram for Grasshopper allows you to stream select meshes to the Fologram device (Hololens 2 or tablet/mobile).
The basic workflow is to use the Sync components to stream data.
Fologram Components

Sync
The primary set of components, allowing for data streaming to your Fologram enabled device.
Syncing Objects
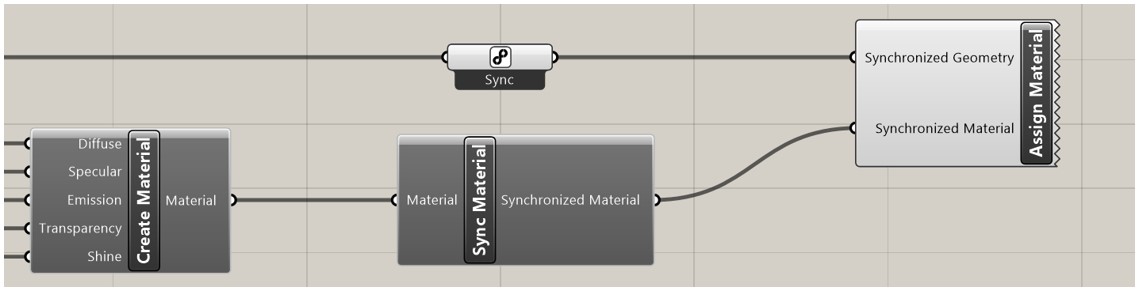
"Sync Object" is the main sync component, allowing you to send a variety of grasshopper data, but mainly surfaces, breps and meshes.
This can be used in conjunction with "Assign Material" or "Assign Transform" and the relevant sync components to further manipulate those aspects of the synced objects.
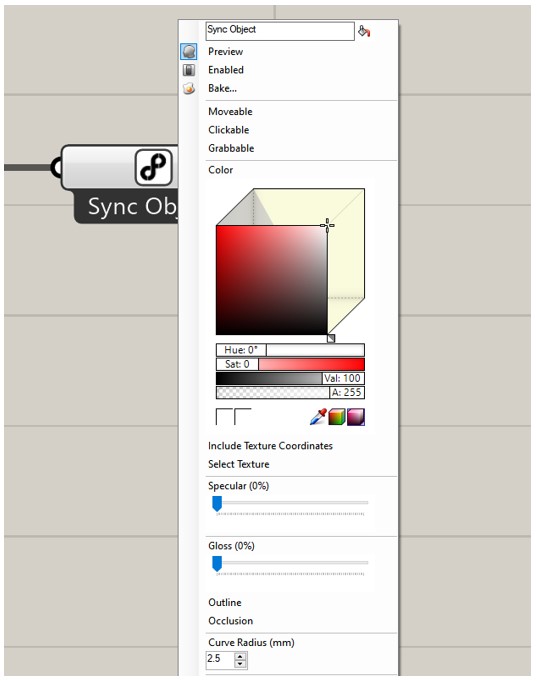
Right-click the "Sync Object" component to access further interactivity (Moveable, Clickable, Grabbable) and display options. For curves, you can set a radius here to preview them as meshes.
Syncing Parameters
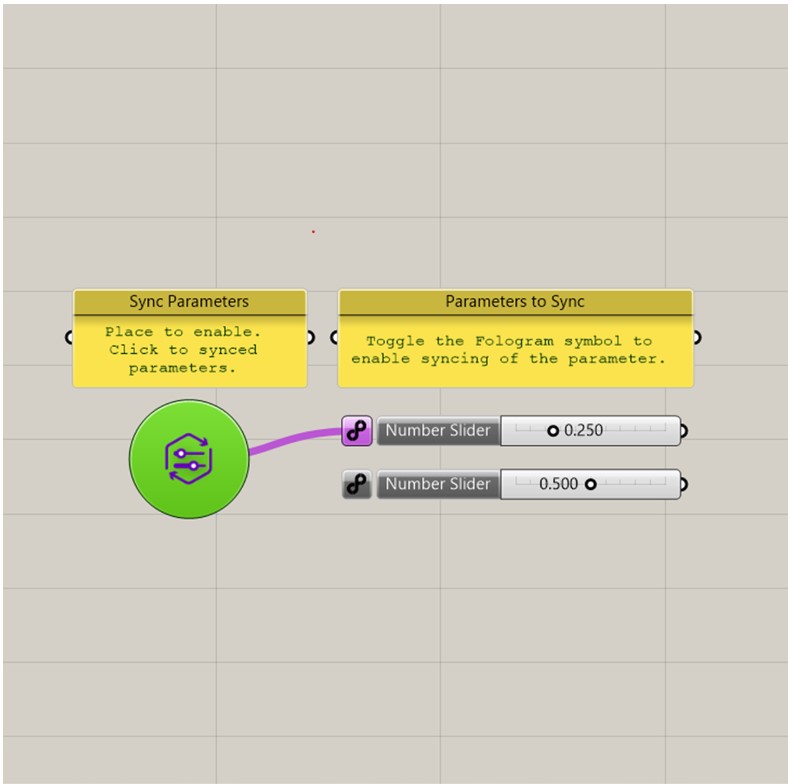
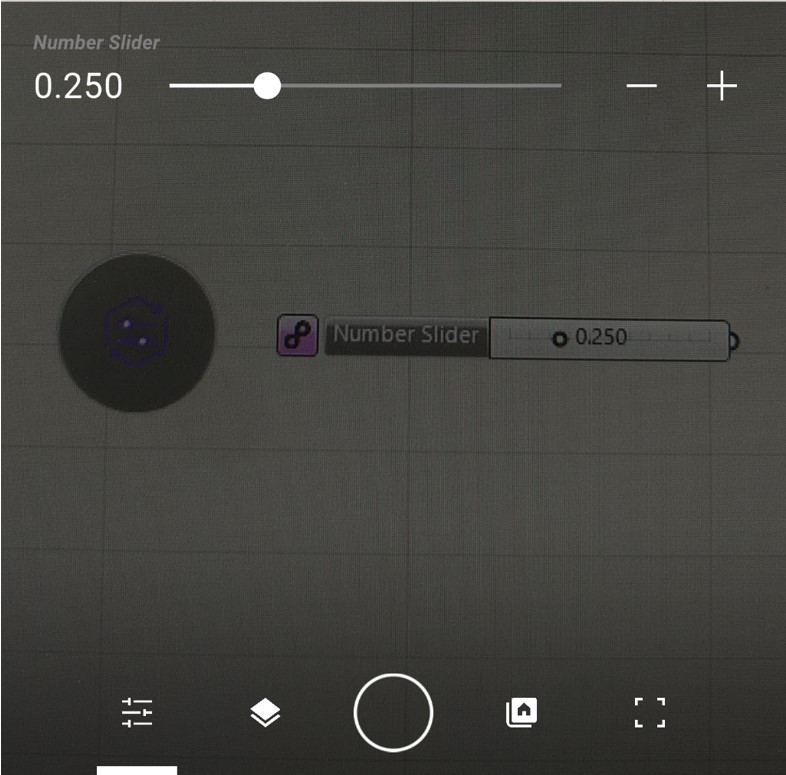
"Sync Parameter" is used for enabling the control in Fologram's grasshopper menu, allowing you to change parameters within Fologram itself. "Parameter Change" provides a way to see which device made a change.
Fologram Menu
This menu has some useful general functionality.
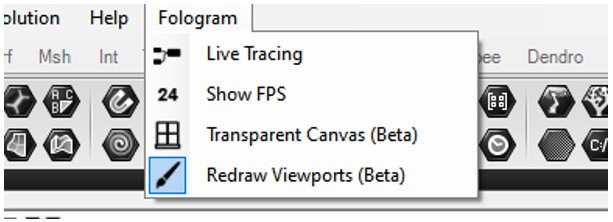
Live Tracing shows how the data is flowing through the script
Show FPS shows the framerate of the Rhino scene
Transparent Canvas allows you to see through the Grasshopper Canvas to Rhino
Redraw Viewports will update the Rhino viewport, this is on by default but you may turn it off to improve performance if you are primarily using Grasshopper for Fologram.