AutoDesk ReCap
Quick Summary
Autodesk ReCap is a reality capture and 3D scanning software that helps you to create high-resolution 3D data from photographs or laser scans and use them in other CAD, BIM and 3D modelling software. Data can be captured from laser scanners or photos taken from a UAV/Drone, then automatically combined in ReCap Pro and imported into Autodesk’s tools including Revit, Civil 3D, Navisworks, Infraworks and AutoCAD.
Installation
To download products, sign in to Autodesk Account or your education site. Find ReCap Pro and click View Downloads. Select the version, platform, and language and then select a download method.
For more guidance from Autodesk on download methods and locations:
Where to download products and updates
User Interface
For an in-depth review of specific UI components, please see the Glossary.
The Project Screen
The Project screen is where you do most of your work with point cloud data. It is divided into several areas:
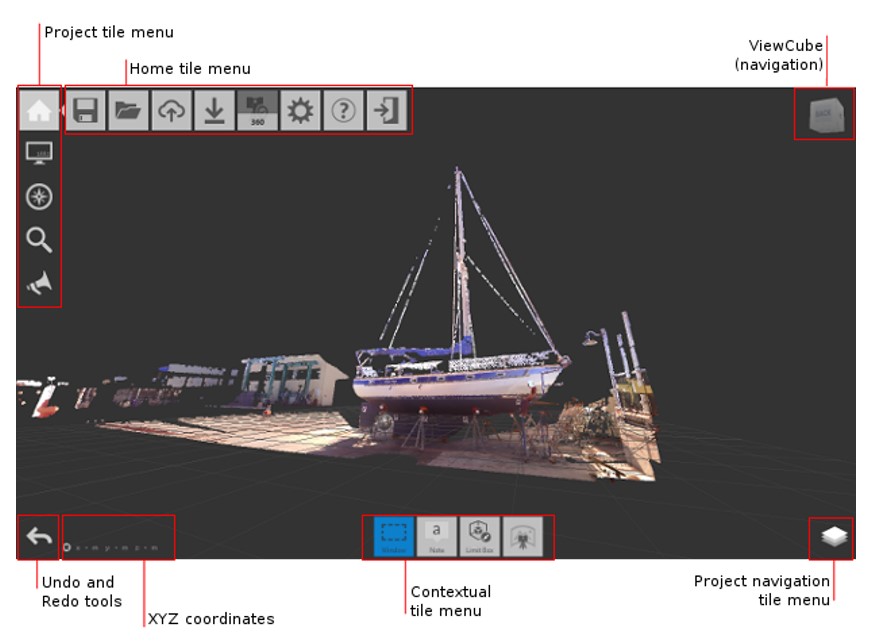
Project tools in the upper-left corner can be used for various functions:
- The Home tile menu provides ways to work with the point cloud project as a whole.
- The Project tile menu analyzes and organizes components of the point cloud.
- Undo and Redo tools reverse previous actions that you've taken.
- XYZ coordinates display for the point your mouse is over.
- The Contextual tile menu changes to reflect current activities. For example, if you are editing a Limit Box, the toolset changes to display tools related to Limit Boxes.
- The Project Navigation tile menu provides access to tools such as Pan, Zoom, and Orbit. This menu is most useful to those with a single-button mouse. Flyout navigation tips on these tiles provide information about navigating with a three-button mouse.
- ViewCube provides a quick way to change the orientation of 3D views.
The Tile Menus
A majority of ReCap’s interface is executed in a series of nested menus. These menus provide quick access to a wide variety of ReCap’s options and functionality. The example below outlines the behaviour.
Move the cursor over tile (a), then over (b), to expand the flyout menu (c).
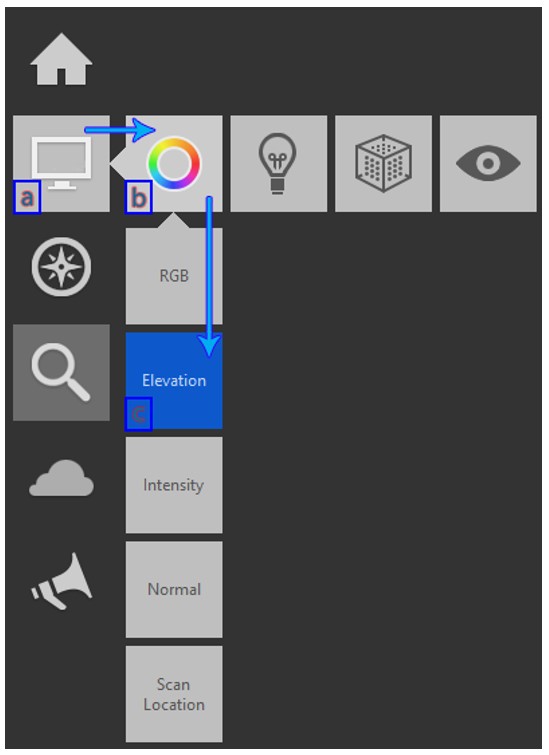
You navigate to the tools on a flyout by hovering over their "parent" tiles to expand them and then selecting the tile whose setting you want to change.
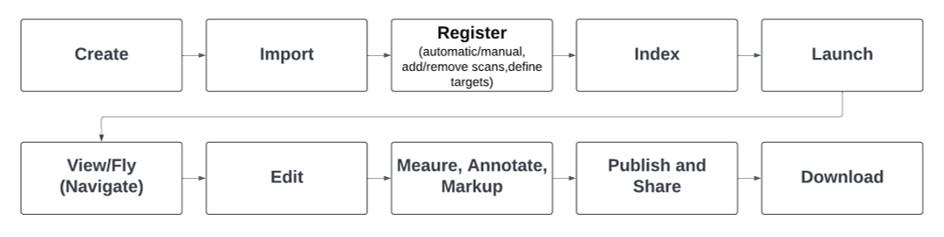
Scan Project Workflow
1. Create Scan Projects
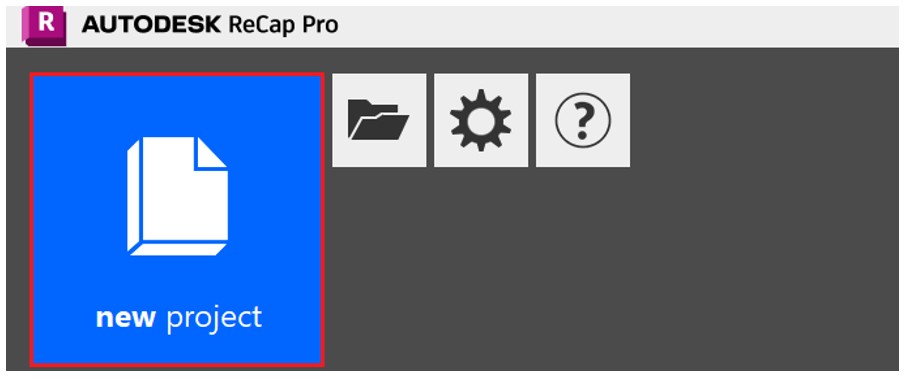
To start, hit the new project button located on the home screen:
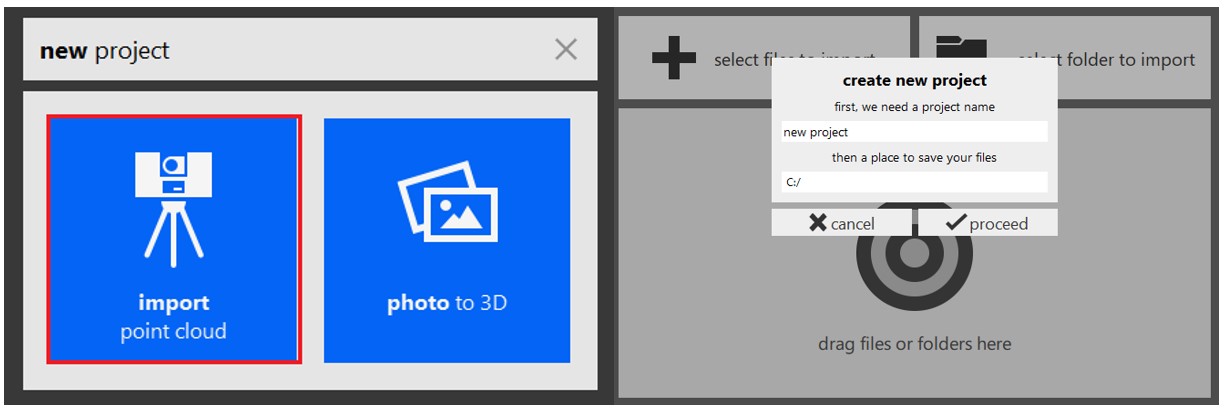
Select import point cloud, and then you are prompted to name your project, and provide the scan files you intend to combine into a point cloud.
2. Importing Scans
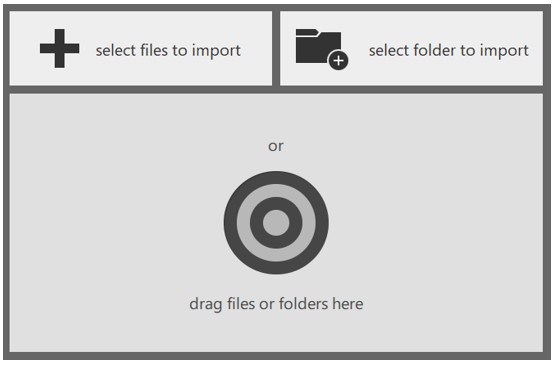
You can elect to either select individual files or folders through the Microsoft® Windows® Explorer pop-up, or simply drag and drop files onto the target area in the centre of the screen:
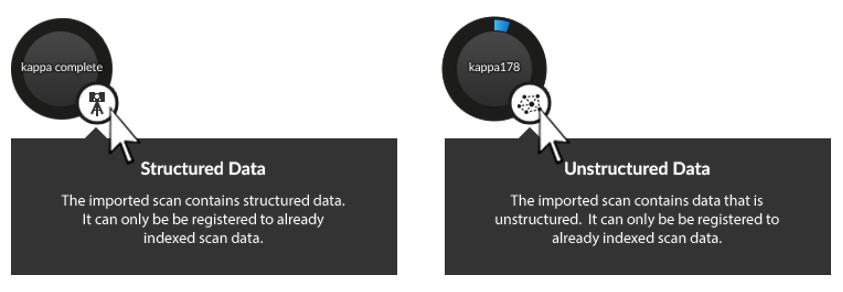
The files can be either traditional scans from a fixed location (structured files), scans from multiple locations, such as those produced by a UAV (unstructured files), or a mixture of both. The scan data type is shown by a badge on the individual scan thumbnail:
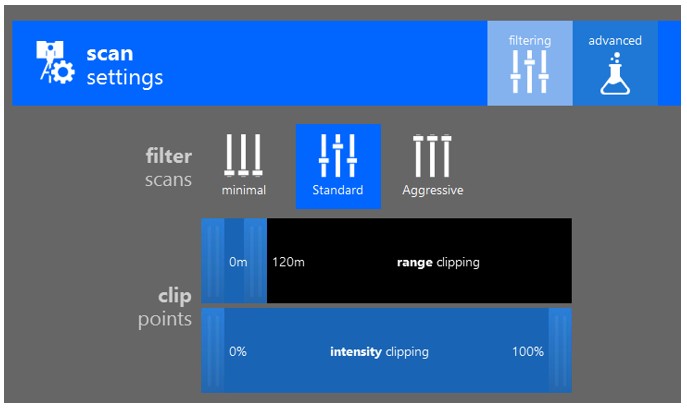
Once the desired files are selected, import options are presented. These allow you to define several settings that affect the result of the import.
Once the settings are selected, the import process begins automatically. All files must be imported before Auto Registration begins. Manual Registration is available as soon as the first scan has been imported.
Manual registration cannot be started with unstructured data. For best results, a structured scan must be used as the basis for registration.
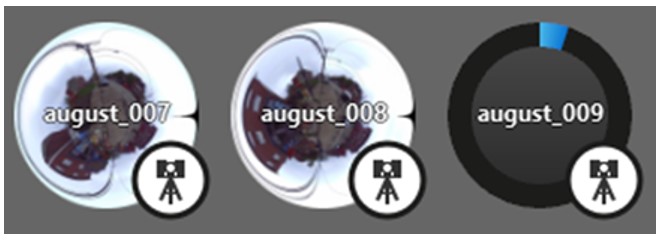
Import may take a few minutes, depending on your number of scans and the density of their data. The import progress is displayed on each scan's individual progress wheel:
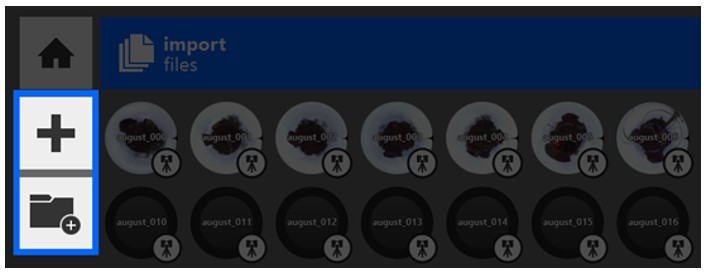
You can import additional files at any time with the Add File and Add Folder buttons on the left side of the screen:
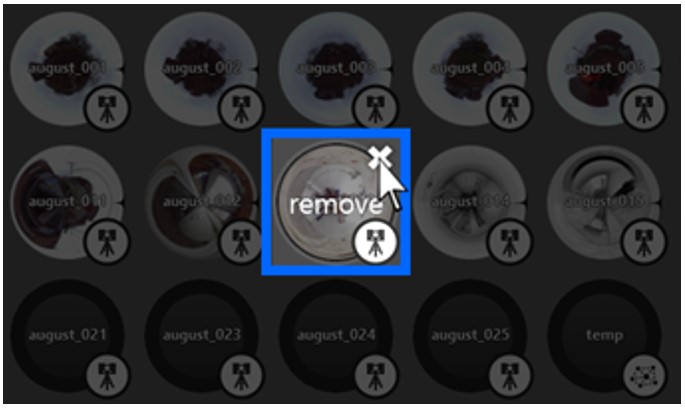
You can remove individual files from the list by hovering the cursor over the file and pressing the "remove/X" button that appears. It might take a few seconds for the "X" to appear after a scan has finished importing.
3. Register Scans
Please see Register Scans for more information from Autodesk.
Auto-Registration:
The automated process for registering scans.
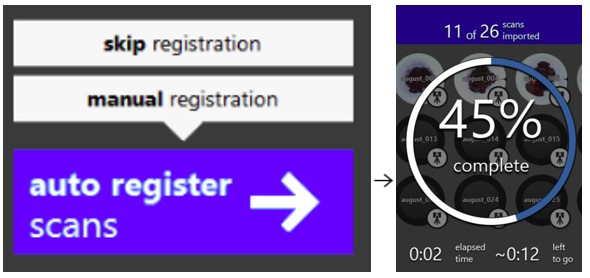
Auto-Registration becomes available once all files have started importing. Simply click the "Register Scans" button in the lower right corner of the application to begin:
Once initiated, any files yet to be imported complete and then the registration process begins. Any pre-existing registration information is lost. Feedback is provided for both import and registration processes, with estimates for completion as well as elapsed time:
If there are multiple groups created using automatic registration, you can use manual registration to manually register the groups together.
Manual Registration
Manual registration can be completed through the cloud-to-cloud technique whenever Auto-Registration fails or is in place of it. The tool can be accessed during the registration process from the bottom toolbar. Manual Registration is also only available in ReCap Pro.
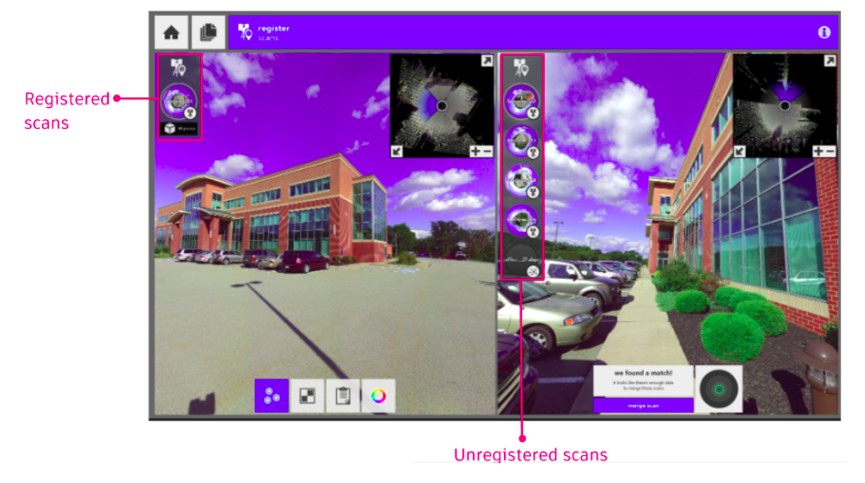
The left pane contains the primary scan group that you are registering. You should think of it as unregistered scans moving from the right pane and into the left pane once registered correctly. To register a scan, select a scan in each pane then place three points in corresponding locations between the two. At least three points are required for each scan, and X, Y, and Z coordinates must be supplied for each point.
Manually register unregistered scabs after an auto-suggestion fails:
- Place three points (Green/Blue/Red) in order for matching points in both left and right scans.
- After the three matching points are placed, ReCap will show the initial registration quality with a colour indication.
- Hovering on the circular quality indicator will pop up a preview of the initial registration result. You can accept the result and then choose "merge scan" to let ReCap further refine the registration result.
If the result shows yellow or red colour, you can refine the initial registration by updating the placement of the matching points.
You can drag to move the placement or delete the old placement and create a new placement.
- After clicking "merging scan", ReCap will refine the registration result. If the refinement result is good, the scan in the right panel will be moved to the left group automatically. Otherwise, ReCap will let you review the refinement result to choose whether to reject the result or approve the result.
4. Saving and Exporting Your Project
You are prompted to save your project when exiting the application. You also have the option of saving at any time through the Save and Save As buttons located in the main menu.
ReCap Pro also allows you to export the scanning project as a single file. This option is also accessible through the main menu:
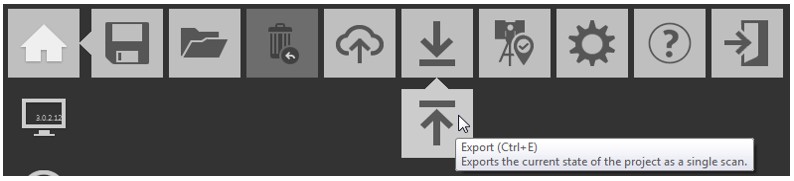
You can export the scan in a number of different file types. These include E57 structured (complete), E57 unstructured (3D only), PTS, PCG, & RCP/RCS.